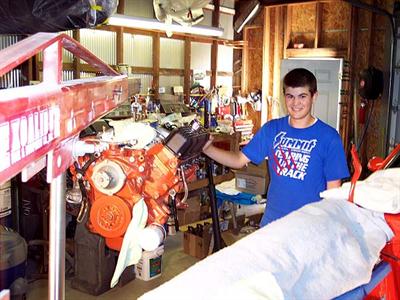

Despite whatever impressions you may have about this project - I'm not a racer and I don't have deep pockets. Never have. The goal has always been to have a cruiser that would run well, put a smile on our faces and, hopefully, look nice doing it - a balance of performance and reliability on a modest budget. No custom pistons, roller cams, trick heads, fancy-pants ignition, or machine work to the Nth degree. I'll leave that to the racers who are looking for every last 10th of a second.
For 2012 I was just going to do a simple carb and intake swap to see if I could improve throttle response and pick up an mpg or two. But the real impetus behind phase 2 of this project came about after a stupid mishap: no anti-freeze in the cooling system, a cold shop, and an even colder winter night. I remember going out that day to find a puddle of frozen water and a core plug under the car. Closer inspection revealed a hairline crack between core plugs on the passenger side of the block.
I decided if I was to go to the trouble of pulling this engine for repairs, we were going to change things up. How about a blower on a budget? Is that possible?
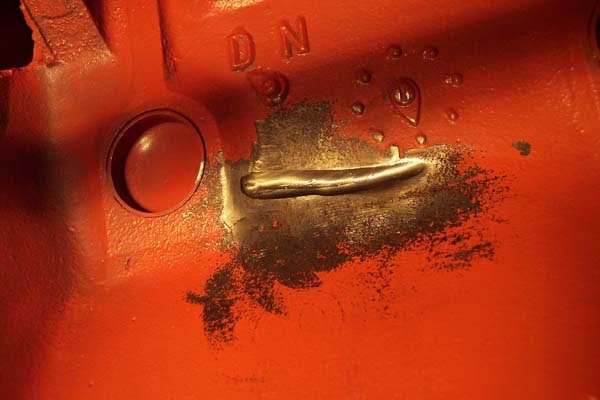
Cracked block still in car - ground back
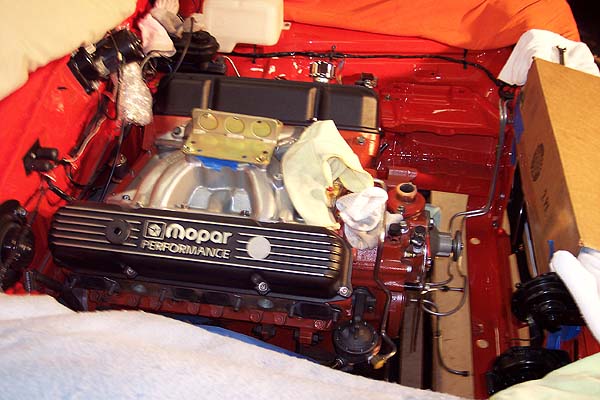
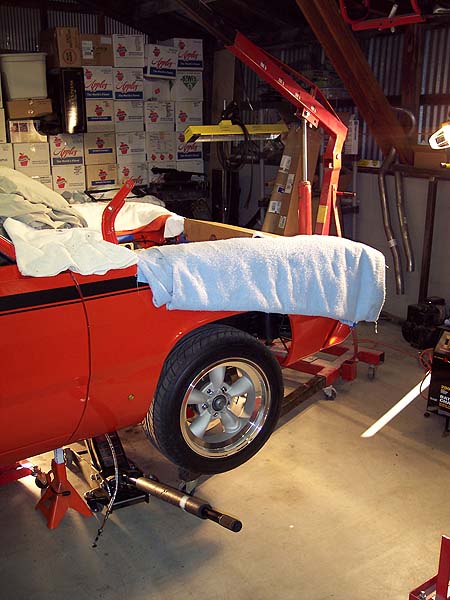
First order of business was to find another core. I have a friend who had several 440's on dolly's in his home shop at (of course) twice the price of what I could get them, complete, at the wrecking yards 20 years ago.
We picked out a 1969 specimen and tore it down to find a .020" overbore from the factory and the crank scored up. Got a better crank from the same guy but then found out from the machine shop that to clean up the bores it would take a '60 over' cut (ie: the last time it could be bored) so I loaded it up and took it all back for another one.
Found a 1970 short block core with dished pistons. Not sure what it came out of. The number stamped at the pan rail was very short - not a typical VIN. So, maybe it was a warranty replacement or came out of a motor home. I like the fact that there's additional webbing cast into the exterior sides of the water jackets.
Tore it down and found some scoring on the undersized crank so we kept the better of the two. Almost every top ring was broken. That poor engine had been abused.
Out with the old...
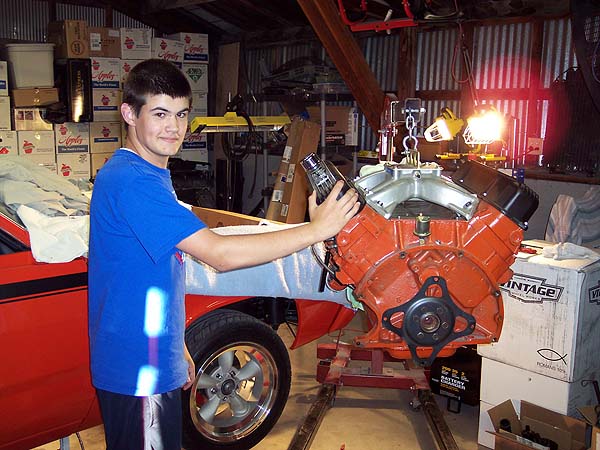
My son and right-hand-man, Austin (15 here) helped pull the engine in short order. Space in the shop is at a premium with little room for the hoist. The engine was lifted up and over the fender which can be nerve wracking - "Don't fail now, hoist."
Once out and on a dolly, the old engine would serve as a platform for blower mockup while I waited on the machine shop to do their thing.
Once out and on a dolly, the old engine would serve as a platform for blower mockup while I waited on the machine shop to do their thing.
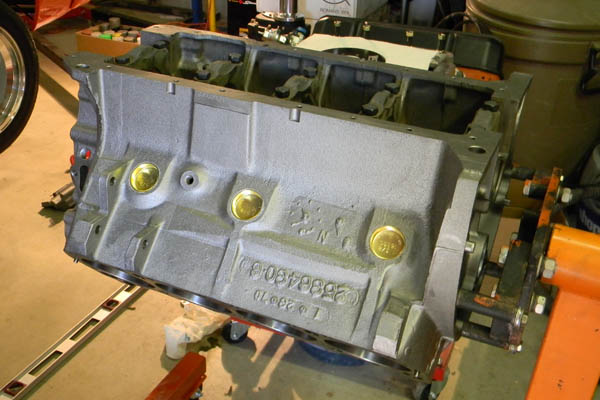
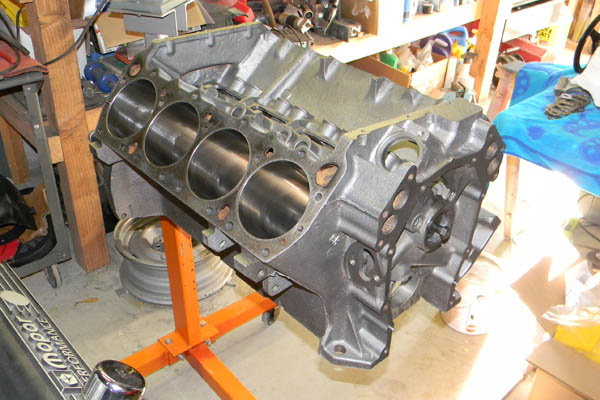
After a painfully long month of waiting on a one-man machine shop the block was returned, ready for assembly. The machinist bored it .030" over, installed the cam bearings, and freeze plugs. Speed Pro L2266F forged pistons were installed on the stock rods after the big ends were resized with ARP bolts. The crank journals were polished and he balanced the entire rotating assembly.
I did not want to spend money on expensive, custom pistons to lower the compression necessary for blower use. I also planned on swapping the "old" 906 heads over to the new short block. Based on my calculations, that piston/head combination with a common FelPro head gasket (.039") would yield a static compression ratio of 8.57:1 - totally acceptable for 4-6 lbs of boost (yielding a 12:1 dynamic compression ratio on pump gas).
I did not want to spend money on expensive, custom pistons to lower the compression necessary for blower use. I also planned on swapping the "old" 906 heads over to the new short block. Based on my calculations, that piston/head combination with a common FelPro head gasket (.039") would yield a static compression ratio of 8.57:1 - totally acceptable for 4-6 lbs of boost (yielding a 12:1 dynamic compression ratio on pump gas).
I also planned on re-using the MP Purple Shaft cam (P4452993) which is a 280*/.474" lift and 110* lobe separation angle. Blower cams with a wider LSA of 114* are typically recommended. However, BDS blowers recommends a cam with 110* for street/gasoline use - and since that's what I had on hand in the old short block with less than 1,000 miles on it, that's what I used. The bottom line with this cam: a little more valve overlap with the intake charge being blown out the tail pipe but a side benefit of cooler running temps. If I were racing and looking for every last 10th second then a cam spec'd specifically for blower use would be in order. But honestly, on the street, the difference would likely be unnoticeable as far as I'm concerned.
The machinist did not remove the old distributor drive bushing and I had a new one to install. Normally, you can run a steel bar up from the oil pump mount and drive it out from below. The bore for the shaft and bushing is stepped near the top so there is very little edge to catch. My bar kept slipping into the bushing and getting wedged. It did not want to budge.
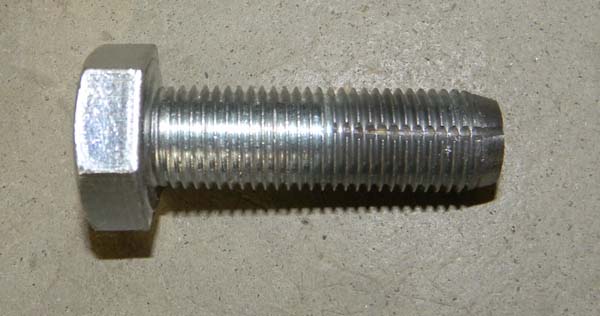
I finally took a bolt I found (which happened to be metric but I don't know the size), chamfered the end, and cut a couple of grooves to act as a tap. The bolt easily self-threaded into the bushing. And with a couple of whacks with the steel bar, the bushing popped out.
To install the new bushing I first put it in the freezer so it would contract slightly. Then, using a socket as a driver, drove it home in the block with a couple of whacks.
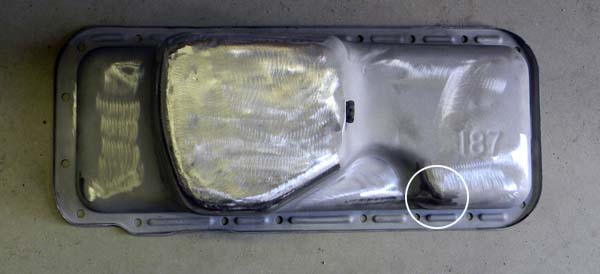
One (of many) keys to installing a big block in an a-body is an oil pan that will get along with the steering linkage. There are a couple of stock pans suited to the task and one of those is the 187 commonly found in C-Body passenger cars. It is notched so that the idler arm can swing left and right. I found that it still needed to be clearanced slightly - specifically in the circled area of the photo. Flattening the corner of the notch slightly with a hammer is all it takes.
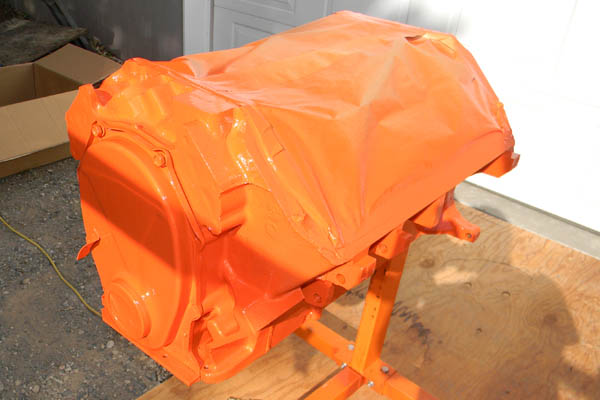
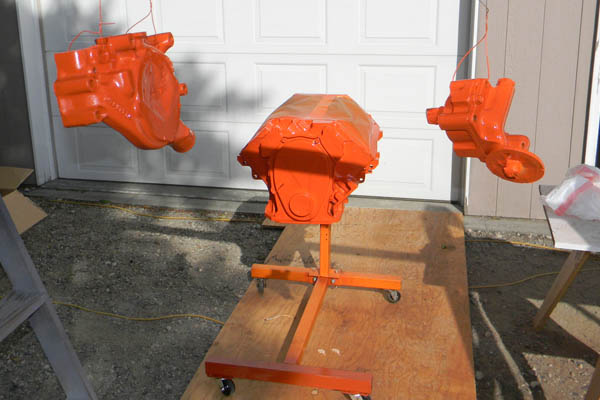
In Phase 1 of this project I painted the engine with Duplicolor engine enamel. It worked okay and the street hemi orange color was correct but it really didn't hold much of a shine.
This time I decided to try the high temp ceramic engine paint from Eastwood Co., including the optional hardener. Their version of hemi orange is a little brighter with less red than the Duplicolor. It sprays nicely and dries to a high gloss. Overall, I like it and would use it again.
This time I decided to try the high temp ceramic engine paint from Eastwood Co., including the optional hardener. Their version of hemi orange is a little brighter with less red than the Duplicolor. It sprays nicely and dries to a high gloss. Overall, I like it and would use it again.
I chose to paint in pieces, in part for better coverage and also because of the timing in which assembly would take place.
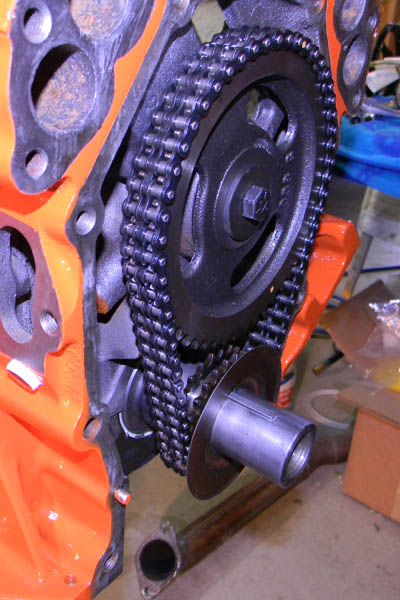
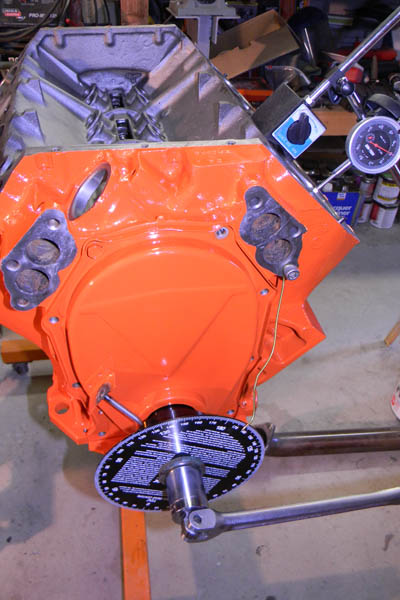
After paint, main bearing clearances were checked (about .0025") and the crank installed. I used the stock rear main seal retainer but the orange VITON fluoroelastomer main and retainer side seals. The side seals are a little tricky to install but if you follow the directions they'll go in just fine.
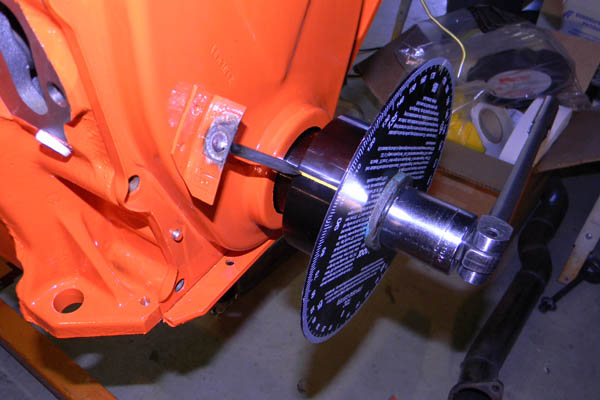
Once the crank was buttoned up I installed the #1 piston so that I could find absolute top dead center using a degree wheel and dial indicator. It's always wise to degree a cam but in this case I wanted to set up a custom timing pointer for the blower crank hub.
The BDS hub employs a second 1/4" crank key, 180* from the stock keyway (highly recommended). I had the second keyway cut and the hub test fitted before taking the crank to the machinist.
The hub has no markings so I calculated where a zero degree mark would be on it and had a friend scribe the hub on his lathe. I filled the scribe mark with yellow paint.
The alternative to crank hubs are SFI rated balancers. Stock balancers are not recommended.
Once TDC was determined I welded a stout pointer to the stock timing cover tab.
BDS sells a timing degree wheel (which I bought) to sandwich with the hub and pulley's but this pointer actually works a little better for me so I left the wheel out. And yes, I painted the pointer orange.
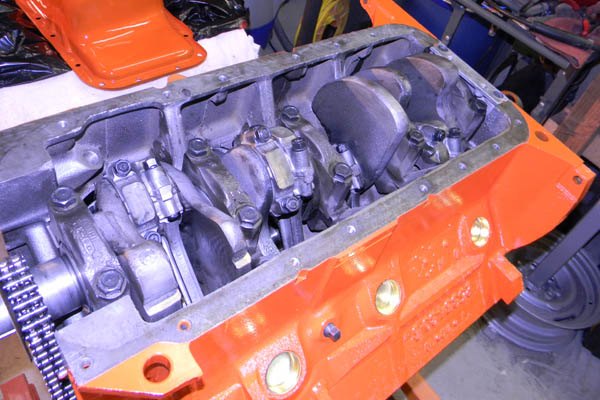
The remainder of the pistons go in but not before opening the ring gaps for a blower motor.
To determine ring gap for a specific application you multiply the bore times a factor ranging anywhere from .0040 to .0070 - depending on intended use.
For me the formula was 4.35" bore X .0065" for the top ring and .0075" for the second ring. That works out to ring end gaps of .028" and .030" respectively. It sounds huge and you'd think you'd have tons of blow by - but that's not the case. With increased pressure and temps you need to allow for the ring to expand and that gap to close. The last thing you want are the ring ends butting and scuffing a cylinder or worse, breaking one.
If you run Hypereutectic pistons (not the best choice for a blown engine) you'll find that setting the top ring end gap is very critical.
The machinist offered to loan me a ring gap filer and I gladly accepted. Don't try it with an ordinary grinder or hand file - the ends need to be square.
My son Austin and I worked as a team to quickly get all 8 slugs installed with rings and rod bearings correctly oriented. 4" of fuel hose slipped over the rod bolts prevents accidental damage to rod journals and helps guide each rod into place.
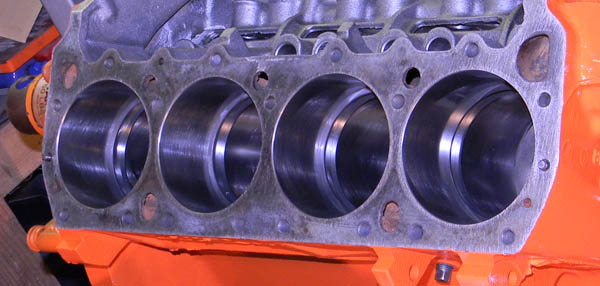
I installed a new pickup (Milodon style from 440Source.com) and began assembly of the tins. In the past I've used RTV (like Ultra Gray) for sealing gaskets, which works fine but seems to begin leaking after awhile. This time I decided to primarily use the old school stuff like Permatex Form-a-Gasket #2, Aviation #3 and High Tack #98.
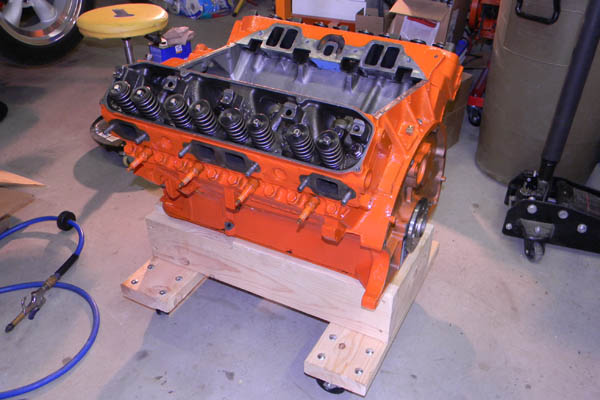
Once the bottom end was sealed up I dropped it onto one of my home made dollies that I can wheel around more securely than a typical engine stand.
With the valve train reassembled and the covers on I primed the oiling system to make sure oil flows where it's supposed to and doesn't leak from where it's not. If the valve covers are loose, oil will overflow. A gauge in one of the ports will verify actual pressure.
A long hex rod inserted where the distributor drive goes and a 3/8" corded drill (reversed) will do it. You have to slowly rotate the engine for passages to line up till oil flows from the rockers. A 1/2" drill would be better. I have no problem generating smoke from my drill after a minute or two of spinning the pump.

From here I proceeded with final mockup to make sure things would fit and, in some cases, function properly. It's much easier to do this with the engine on a dolly or stand than in the car.
DIY Intermediate Shaft Bushing Removal Tool

No BB Oil Pump Gasket?
FelPro does not include an oil pump to block gasket in their kits. Why they don't remains a mystery to me (they include the oil pump o-ring and a half-dozen other odd gaskets no one will ever use).
You can't walk into an auto parts store and buy one either like you can, say, for a thermostat housing.
If you're in need of a gasket, I've created a copy from the real thing that you can print on card stock or transfer to gasket material and cut out.
Download it here.
You can't walk into an auto parts store and buy one either like you can, say, for a thermostat housing.
If you're in need of a gasket, I've created a copy from the real thing that you can print on card stock or transfer to gasket material and cut out.
Download it here.

Have unusual markings stamped on your engine ID pad? Here's what they mean.
UPDATE: I later purchased a "Sealed Power" (sealed Power and FelPro are both Federal Mogul companies) gasket set for a 440 for another project and it included the oil pump gasket.
 |
 |
 |
 |
 |
 |
 |
 |
 |
© 2013 JP Herrick Enterprises - All Rights Reserved
Site updated: January 2014

