

Almost every panel on this car, except for the driver's door and hood, proved to have previous crash damage - mostly on each of the four corners of the car. Old red-oxide primer covered the "recent" repairs which appeared to have been done by an amatuer. I found a minimal amount of proper metal-work and plenty of Bondo beneath. But the worst was the right rear quarter...
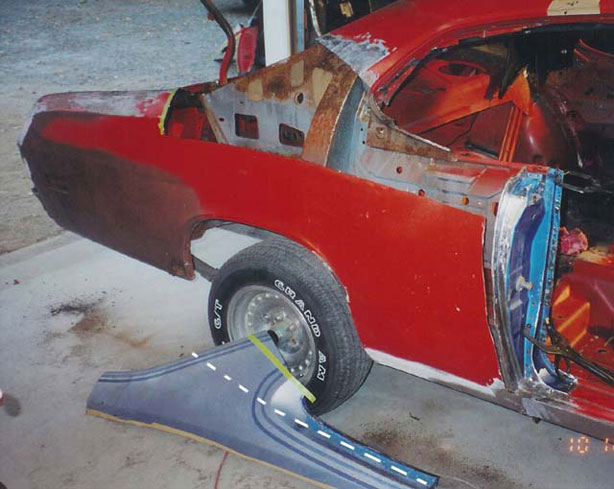
Apparently, the car took a good hit that damaged the passenger door, door inner structure, door jamb, outer wheel house and who knows what else. No signs of damage to the rocker panel. Some shop, in their haste, cut the original where the dashed line is on the photo above. Then, simply and crudely overlapped the "replacement" and welded it back on. Weld joints in the trunk lid gutter were also overlapped, very crude, and now rusty. Weld seams on the outside were beat down and slathered with a thick and generous amount of Bondo. Much of the rest of the quarter was covered in Bondo too. They had cleaned up the door jamb but it didn't look right. So, I found some donor sheet metal to graft in. Drilling out spot welds, even with the proper tool - is a barrel of laughs.
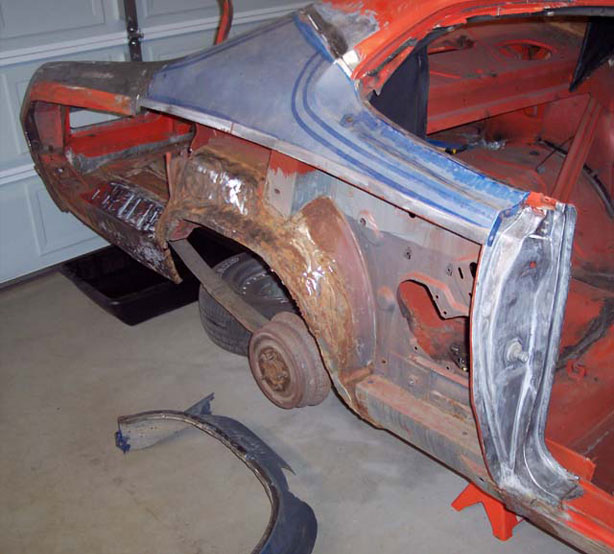
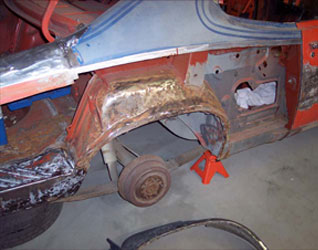
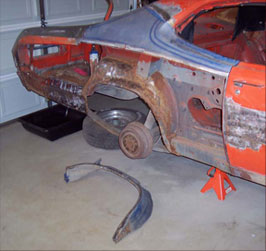
I then cut the rest of the quarter off. Notice how rough the outer wheel house is. Not only was the edge pretty trashed, when they did the repair no attempt was made to seal the wheel-well or any of the seams for that matter. Consequently, water leaked in easily and corroded everything. In fact, serious cancer had already set in behind the wheel. A section of the wheel house from the same donor would get that part back into shape. The passenger side door was also ditched in favor of a suitable replacement.
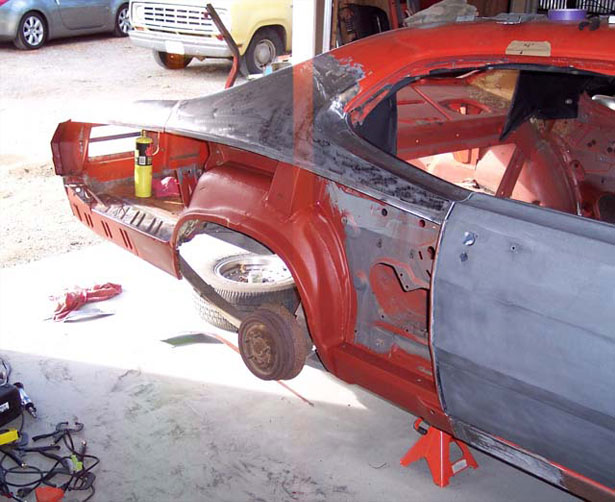
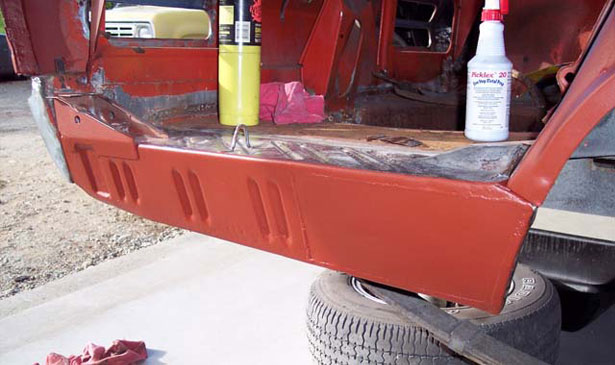
With the wheel house repaired, Picklex 20 was also used to convert some rust. More serious cancer was cut out of the trunk extension, a patch welded in, and things coated with more Eastwood Rust Encapsulator. Since this car was not intended to be a full restoration, factory original appearance was not an issue.
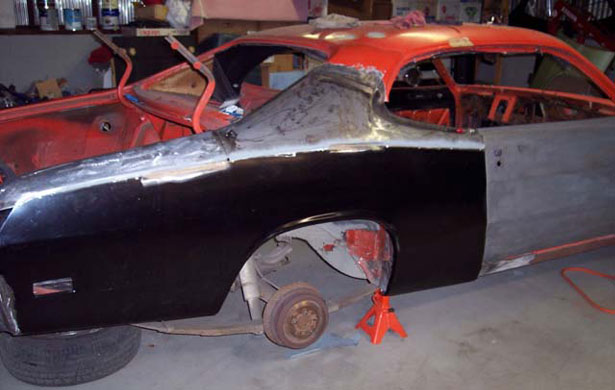
The upper sections were flanged and then a quarter skin trimmed and trial fitted until everything looked good. Sheet metal screws hold everything in place. They were removed and replaced several times in the fitting process.
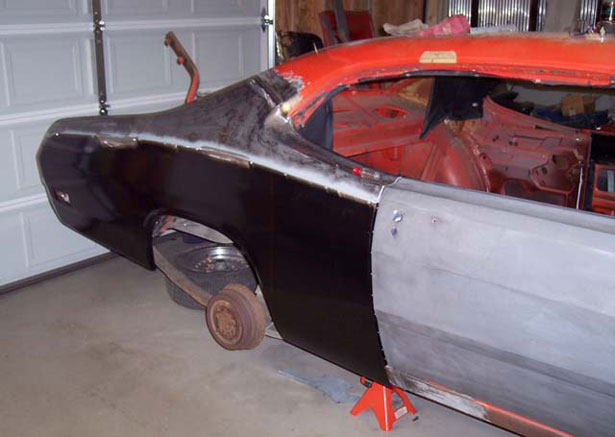
The only thing available for these Mopars is tin stamped out in Taiwan. It's thinner than original, and the body lines are only fair. Not as ideal as original stuff but even finding a suitable donor is hard and was simply not in the cards (or practical) for this project.
A "pro" would have butt welded the quarter on but I felt flanging and overlapping the thin material might help keep warpage down. If I were to do it again this way I would probably use a backing strip rather than a flange. Still ended up with some minor warpage. The entire bottom edge of the panel (wheel opening and trunk extension) were bonded with SEM Duramix, rather than welding. Lord Fusor is a similar product. It's a two part panel adhesive which is extremely strong. I did this to seal the seam against moisture. Spotwelding like the factory would have made this very difficult to do. Crash tests have proven these types of joints to be stronger than the surrounding metal. I could have "glued" the entire panel on if I had wanted to. Many of today's cars are bonded together.
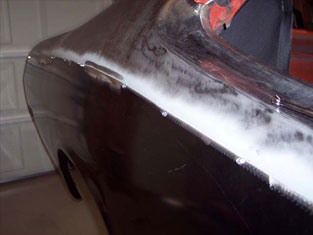
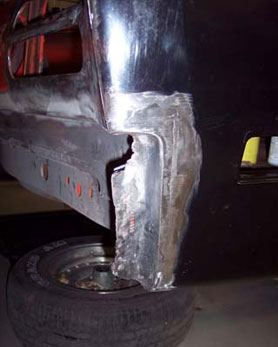
Though the majority of the replacement skin was correct, this corner at the bumper wasn't remotely similar to original.
So, I cut the recessed section detail from the junk I had removed and grafted it in.
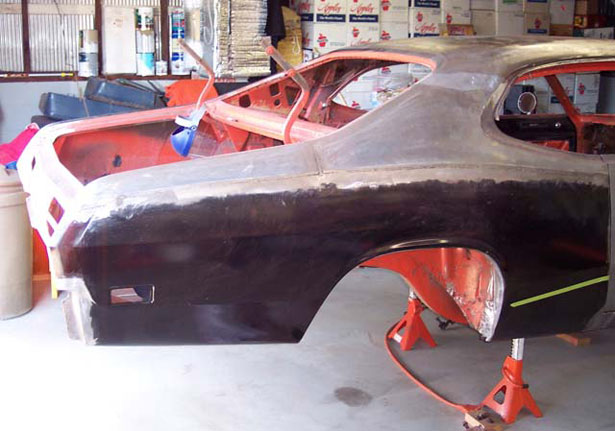
The next area to attack was the trunk. A previous owner had removed and replaced the tail lights without resealing them properly against the body. When water ran down the back of the car it pretty much had an unimpeded path right into the trunk. Once inside, it would get trapped under the trunk mat and pool in the spare tire well. Can you say swiss cheese?
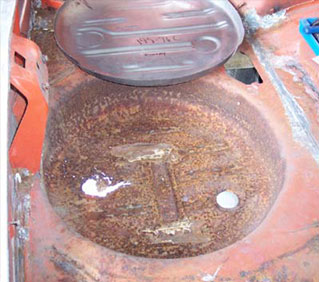
I thought just the bottom of the tire well needed replacing and that the other rust was just surface. Yeah, right. In my dreams.
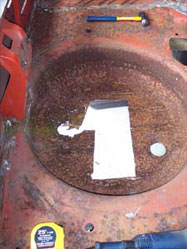
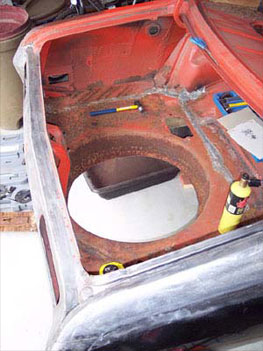
There's a spare tire hold-down bracket spot welded to the bottom of the tire well. Two lugs from this bracket pass through the floor and act as anchor points for the gas tank straps. It was in extremely poor shape but I cut it out and saved it for future reference - no one makes this piece.
A nice, neat cut opened the bottom up. However, upon closer inspection I found pin holes higher up - the rust was more serious than I thought. Poking around other areas of the trunk floor I found other bad spots. This trunk rusted from the inside out. The underside of the car was in good shape.
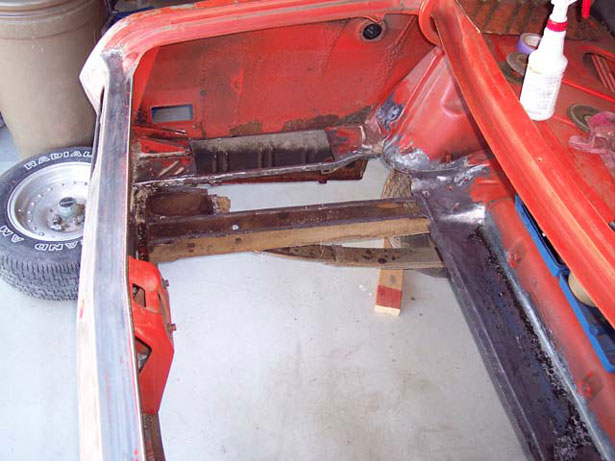
So, out comes the saw and spot weld cutter again and the floor goes bye-bye. The inside of the frame rails and shackle boxes would be coated with Zero Rust for protection. A lot of cutting, trimming, and even modification was required to get the "new" repro trunk floor installed properly.
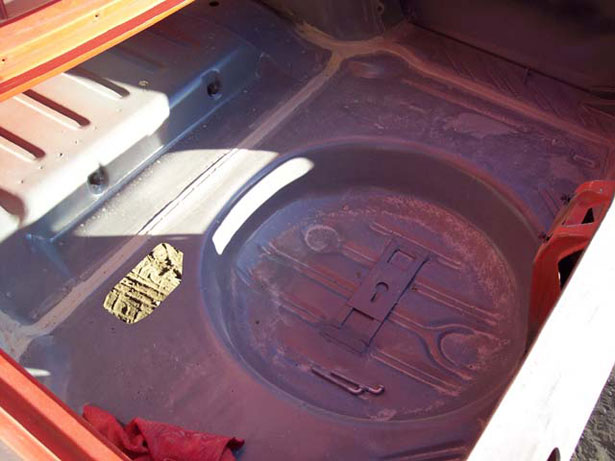
This shows the installation (much, much later) covered in body filler dust. It was coated in epoxy primer and the seams resealed with 3M firmset in the similar, unattractive way the factory did it. I ended up fabricating a new spare tire hold down while retaining the original lugs that hang down underneath for the gas tank.
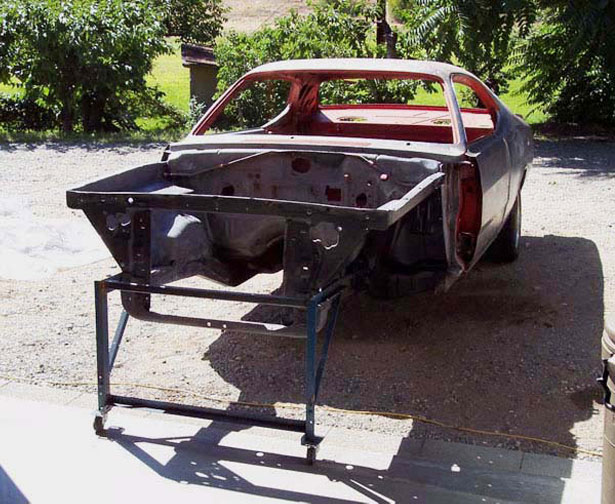
In order to get the body mobile again, I mocked up the bare 8.75" housing with axles, springs, and scabby rolling stock. An old bed frame was cut up, welded, and bolted to the front frame rails with casters so that the shell could be pushed around for body work. The k-member, front suspension and steering had long ago been removed for cleanup, modification, and refurbishing.
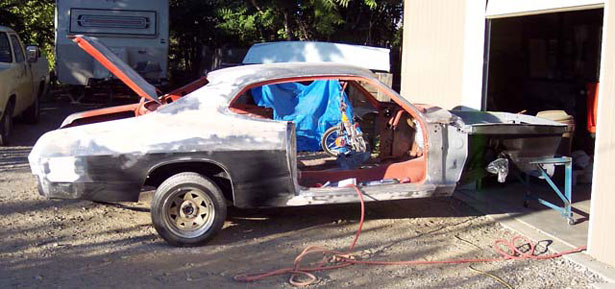
The Frankenstein-like seams of the rear quarter were first coated with USC All-Metal then topped with Feather-Rite Body Filler. Here, filler is being applied to other areas needing attention as well. Trim holes in the rockers were welded up and skimmed with filler to finish. Previous crash damage on the opposite rear corner was reworked prior to applying filler but even that required a fair amount of sculpting for the compound body lines that converge there.
Body work is probably my least favorite chore - ranking right up there with drywall work and perhaps a proctology exam. For me, it's tedious - probably due to lack of practice and experience. (Fall 2005)
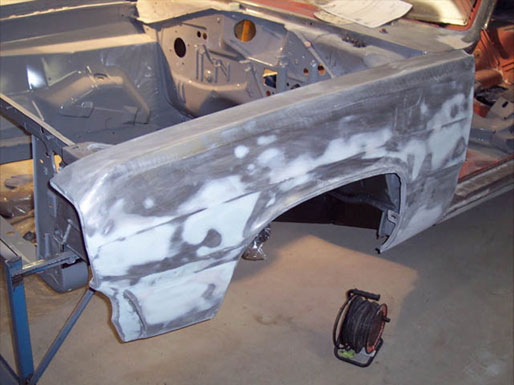
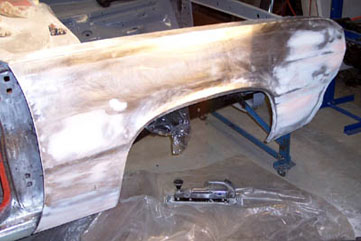
One of the little custom touches on this project is to shave the marker lights, door handles, radio antenna, and emblems. Here, this donor fender marker has been filled with metal and skimmed with filler and icing. Holes from an aftermarket side moulding were welded up so there's a little more plastic than would otherwise be necessary. On the passenger side, the glare from the light on the bare metal makes it look like it's covered with filler - It's not. (Jan 2006)
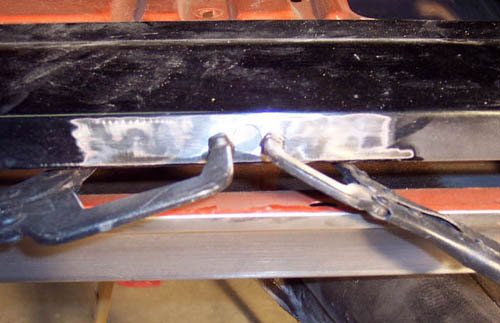
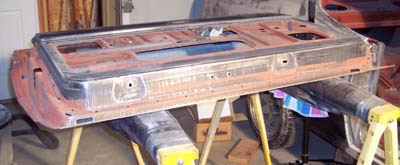
Door handle and lock cylinder holes were filled by welding in plugs. Since the door lock knobs would no longer be needed they were also plugged and finished. A piece of 18 ga steel was formed and tacked inside where the side view mirror mounts to reinforce this area - and holes redrilled. The same will be done on the passenger side where a factory mirror will be added. The old finish on the inside of the driver door has been scuffed and ready for primer. (Feb 2006)
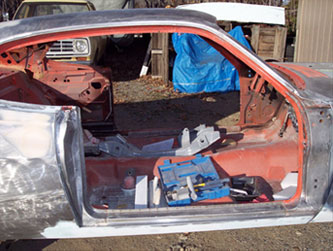
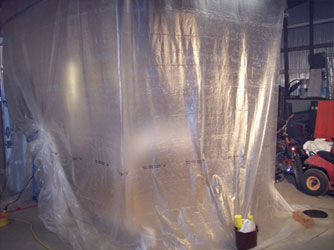
Once the snow cleared I rolled the body shell outside so that I could make a makeshift paint booth inside to reduce overspray all over everything.
Then a door, deck lid, fenders and what-not were sprayed with epoxy primer.
That's the primed k-member sitting where the drivers seat usually is. (Mar. 2006)
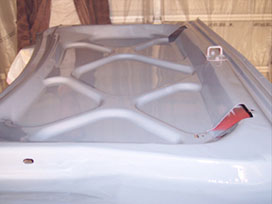
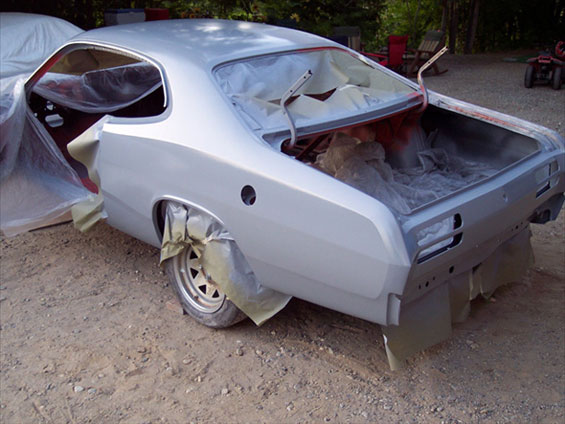
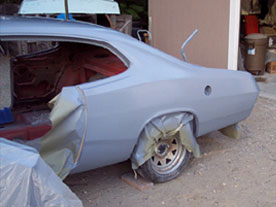
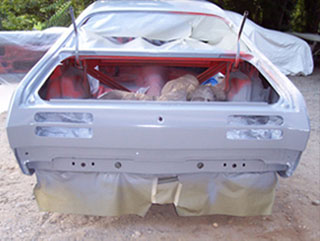
After some (a lot actually) finessing, the roof, left rear quarter, and tail panel are sprayed in epoxy. Almost all had sustained crash damage at some point in time and my mods just added to the work. The quarter alone had the modified fuel door, shaved marker, and lower quarter patch (Sept. 2006).
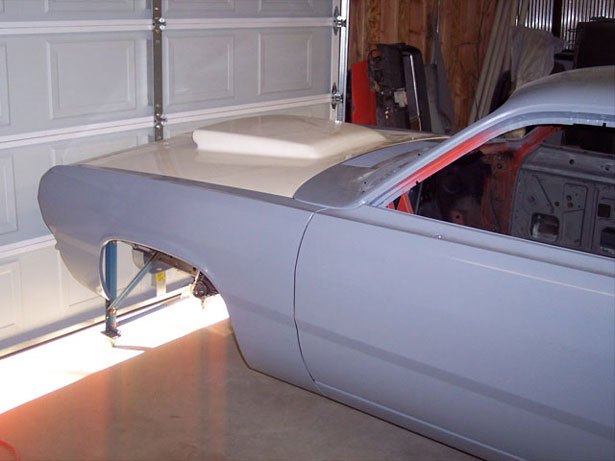
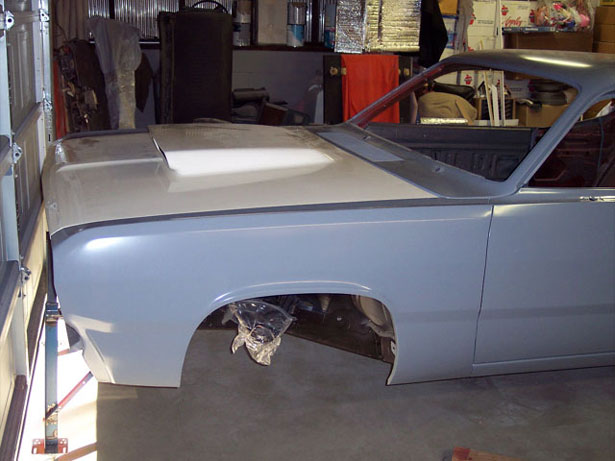
I spent time hanging and aligning panels so that I could finish work on the passenger side where the new quarter meets the door. There are some contour differences (big surprise) between the original and Taiwaneze-stamped skin. When that's complete I'll cover the epoxy with high-build and begin blocking. I threw the Six-Pack hood on for fun. Cool!
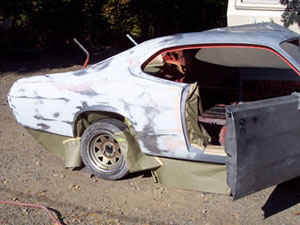
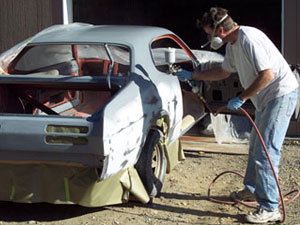
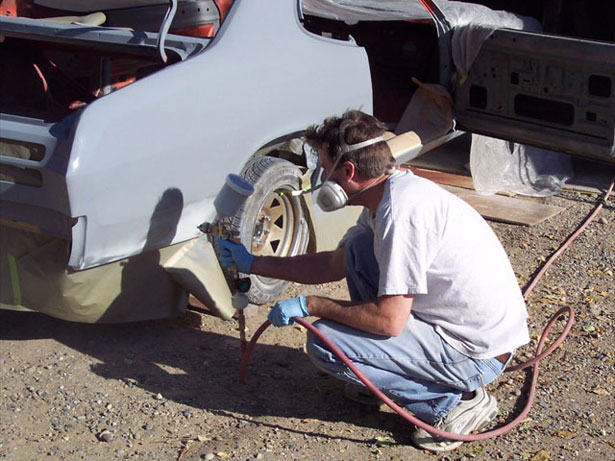
The right, rear quarter finally gets some epoxy primer. A lot of work to get to this point. The steel of this quarter skin is thinner than OEM with plenty of imperfections. Getting some uniform color on it made a huge difference.
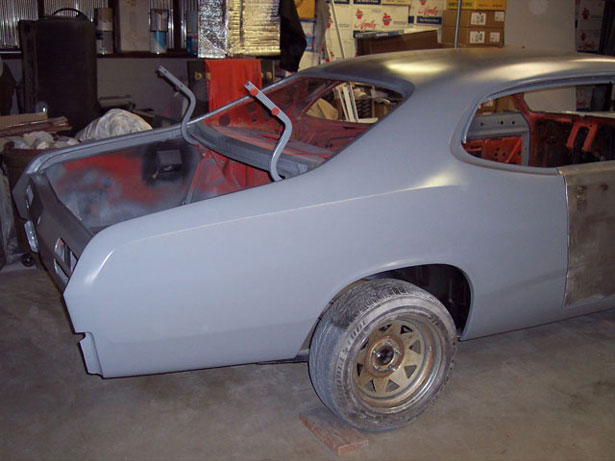
The passenger door (from donor) was the last to get sealed. Someone had taken a big 'ol grinder to it to remove paint in spots (ouch), resulting in gouges. I had it media blasted with the other panels early on so it cleaned up well and got rid of patchy surface rust - leaving some pits. Except for a couple of dings it appeared pretty straight. However, a thin skim-coat of filler revealed waviness and other defects. This took care of the grinder scars too.
I coated the inside with Zero Rust for protection then sprayed the outside with epoxy.
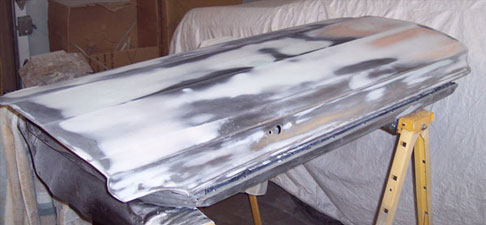
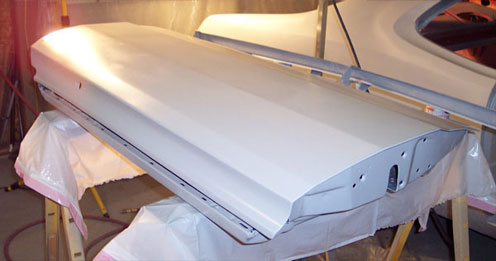
(Below) AAR Quality Fiberglass makes one of, if not the best glass hoods (and other parts) out there. Fit and finish is excellent, so very little prep is required before painting. The back edge of the hood at the cowl is about the only edge not supported in some way. Therefore it droops in the middle ever so slightly. In most cases you could ignore it as it isn't really noticeable. But, this would require a slightly larger gap, otherwise it tends to bind on the cowl when you open the hood. Not good for paint...
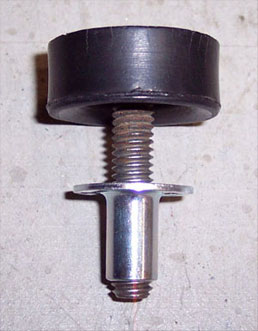
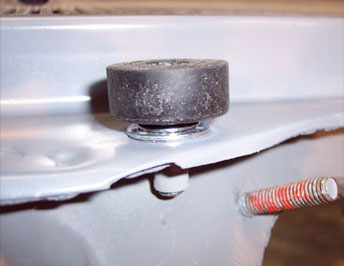
After some thought I went to the hardware store and picked up a t-nut that would accept a standard hood bumper - normally found at the front corners. This t-nut was found in the furniture specialty hardware section. There's a perfect spot on the cowl for one of these. Just drilled a hole and tack welded it on the underside. A new hood bumper bolt (with rubber) was trimmed shorter and threaded in place. Completely adjustable, looks "original", and it'll support the hood in the middle preventing interference and flutter/vibration while driving down the road.
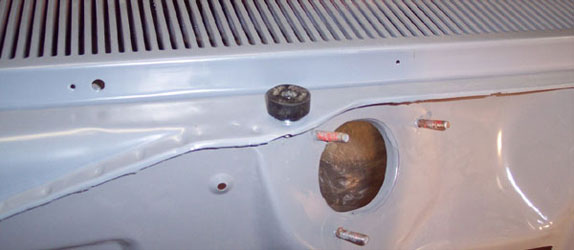
I had decided early on to add a factory mirror to the passenger side door. After some careful measuring of the driver's door I transferred the measurements and drilled pilot holes.
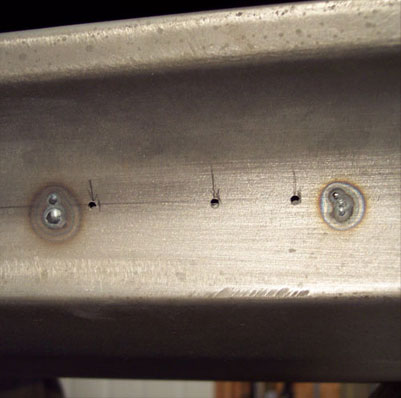
The factory wouldn't add reinforcements for things like the exterior mirrors, door strikers, and such for another year or two. In fact, I had to repair the striker area on the drivers side right after I bought the car. It's not uncommon in early a-bodies for the metal to tear right out - especially after the hinges wear out and the doors sag.
Incidently, the jamb I replaced on this side came from a later car and it had the factory reinforcement for the striker in place.
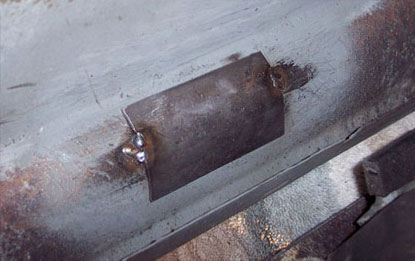
The driver's door was damaged where the mirror is mounted so I added a reinforcing backing plate there and to this side.
The pilot holes helped me to locate the plate inside the door where working space is tight.
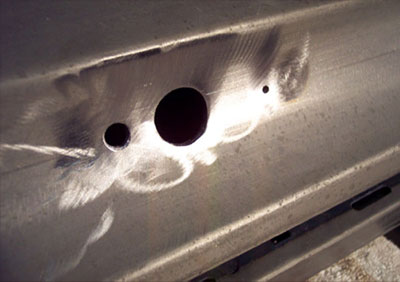
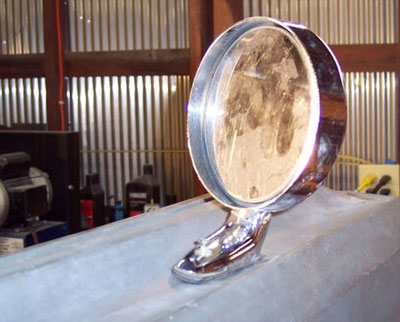
The pilot holes were bored out to the correct size (thanks again to those step drills) and the mirror (from E-bay) test fit. Hmmmm, you'd think the car had come equipped this way...
Both mirrors were then disassembled so that the housings and bases could be re-chromed. (Note: After learning the cost to re-chrome mine - about $280 per side - I chose to buy reproduction sport mirrors now available).
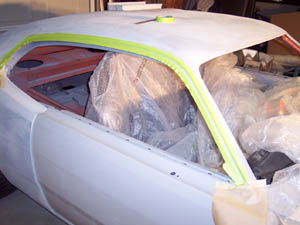
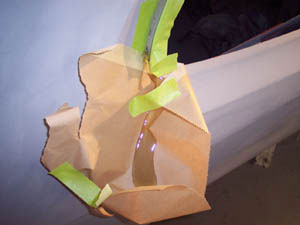
I had removed all the original seam sealer from the roof gutter. Once the gutters were primed with epoxy I was ready to gun new sealer. I had been dreading this as I had visions of sealer running down the sides of the car. (As it turned out, my fears were confirmed). The first step was to mask in order to keep the surrounding area clean and make a clean edge once the tape was pulled.
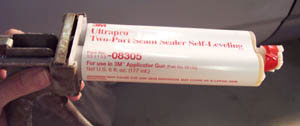
My supplier friend sent over two tubes of 3M sealer - a two part self-leveling and a heavy bodied. Two part sealers/adhesives require a special and expensive applicator gun which he kindly loaned to me.
I loaded the self-leveling sealer which manufacturers recommend for roof gutters. It flowed out like honey and ran about as fast. In an attempt to slow it down I threw the shop doors open to let cool air in. It seems like it took forever to "kick" and solidify. As you can see in the bottom picture it overflowed my dams at either end and pooled nicely in the paper I'd placed there - uuuhhhggg. The top, horizontal part of the gutter looked pretty good - a tad low, but pretty good. Both ends were way too thin.
I loaded the "heavy-bodied" sealer and tried a small spot on the other side. It was too thick and didn't flow out at all. I removed it.
A week later I got a tube of Fusor #129 from my buddy with its corresponding special gun. It was similar to the 3M heavy bodied but "flowed" with a little finger tooling. Its appearance and hardness, once cured, matched the factory material (the 3M remained slightly soft and tacky). The biggest difference is that it kicked very fast. You gotta work it quickly. On the other hand, it can be shaved and sanded once it cures - unlike the 3M stuff. It was still a pain no matter how you look at it.
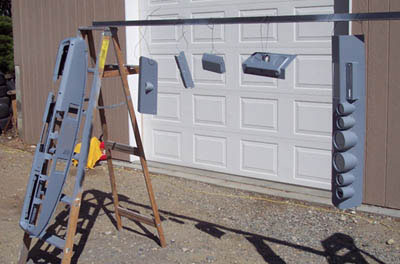
The RMD inserts, glove box door, hinge, ash tray, and dash frame are all primed in preparation for some new color. Once that's done, new gauges will fill the holes and I'll reassemble the entire thing with dash pad and wiring. When the time is right, the whole shebang will go back into the car as one piece.
Below, the main inserts gets a coat of Sikkens metallic silver base with semi-flat clear.
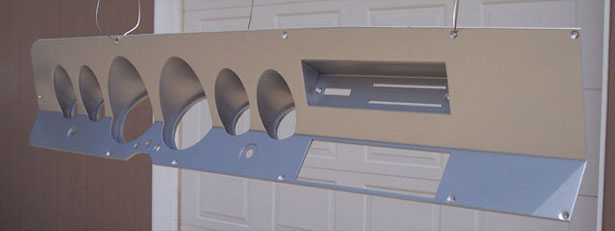
And here she is near the end of the mock-up stage. The next step will be to lay down primer/surfacer and block it out to perfection. Then: color.
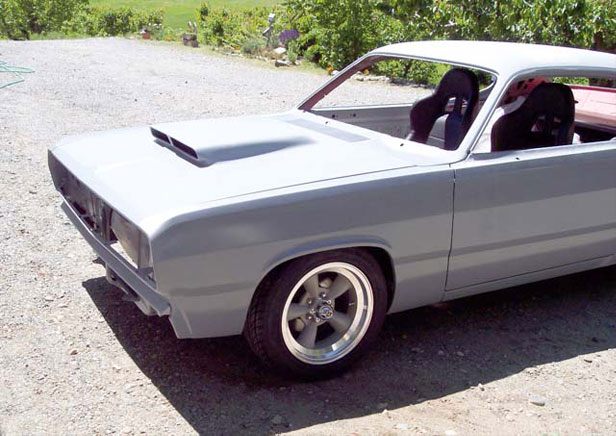
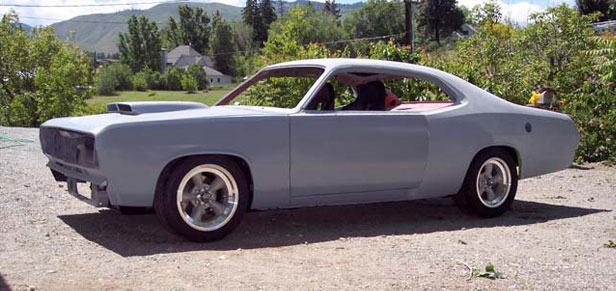
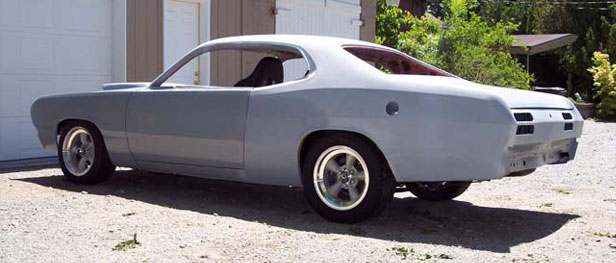
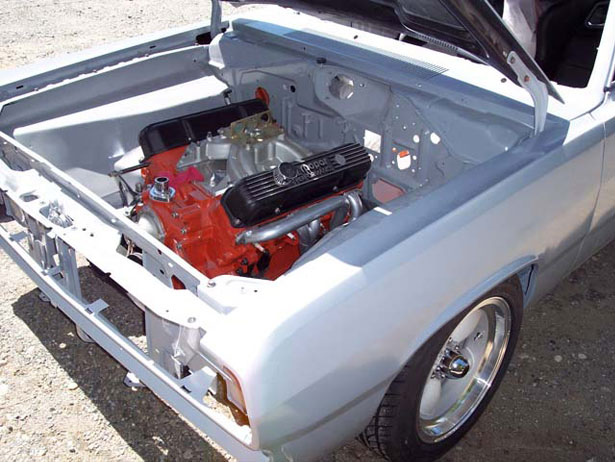
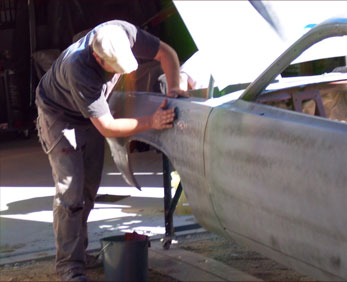
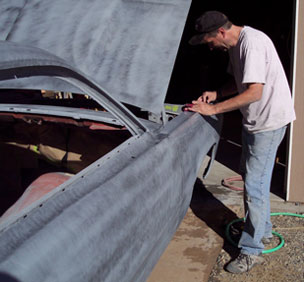
The drive train and front suspension was removed again and In early August 2007 a friend of mine, who works at a production body shop, came over and helped wet sand with 400 and 600 grit paper and rubber backing pads. Less than 3 hours later we were through and were able to easily see the imperfections in the surface. There was nothing major and at this stage some would have considered it flat enough to paint. It wasn’t good enough for me though. So, since we were going to paint it in pieces anyway, I decided to blow it apart and re-block each panel starting with 150 and working back down to 400 using Durablocks and a couple of wooden long boards I had. Block sanding the panels on a stand rather than on the car is much easier.
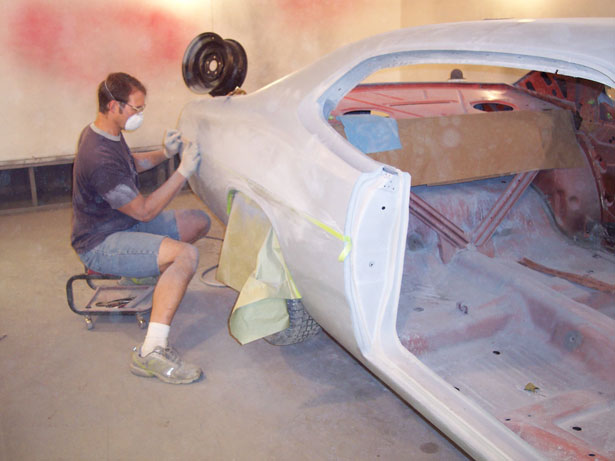
After spending many additional hours blocking and priming the indvidual panels I still had spots I wasn’t satisfied with. They were totally undetectable by hand, but if you sighted carefully down the side of the body you could see a slight ripple here or there. With patience running thin I decided to swallow my pride and turn the last of this most critical stage of the paint process - preparation - over to professionals. After this much time and money invested, the last thing I wanted was a nice paint job with a less than perfect body underneath.
I hauled the body down to Earhart’s Body Shop. It’s two brothers who do a lot of hot rod and custom work and who are as anal, if not more so, than I. With a lot more experience than I, they’re “sticking” it to perfection. I even hauled the doors and fenders down for them to go over.
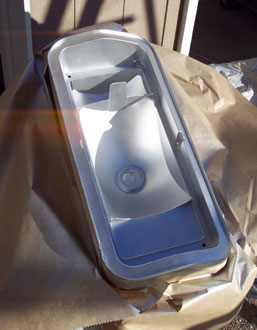

Meanwhile, back at the ranch, I continued with restoration of various parts including the tail lamps.
I media blasted the housings and repainted the bright silver inside. I also polished the lenses, then masked and painted the blackout portions. They look about as good as new and would have to do since reproductions aren’t available. New lens to housing gaskets from Detroit Muscle Technologies sealed up the once leaky assemblies.
(Sept. 2007)
(Sept. 2007)
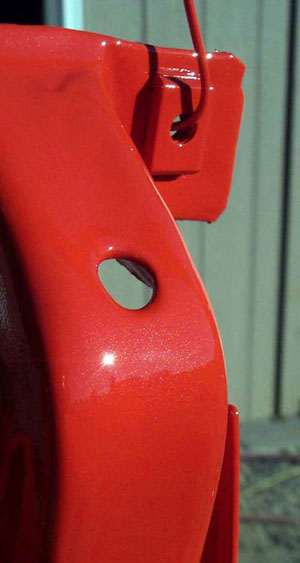
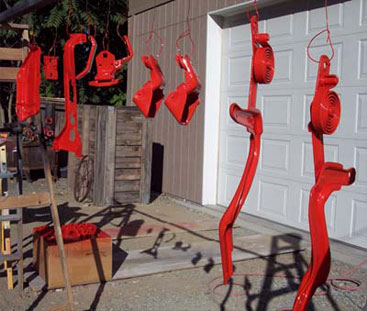
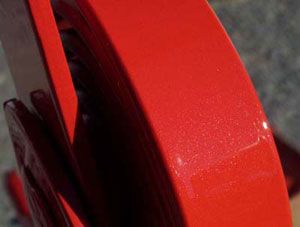
I also was anxious to see what the orange was going to look like so I hung various small parts and shot base followed by 3 coats of clear. This was really exciting to finally see some color. I was also pleasantly surprised to see the metallics in it. There’s a very small amount called for in the formula. These weren’t noticeable in the old finish and I really like it.
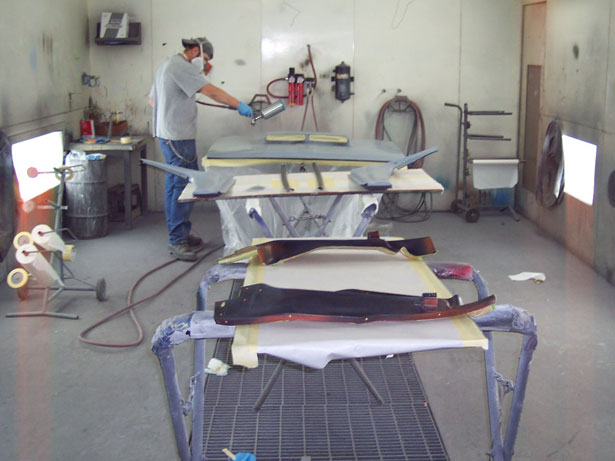
In early October we got more small parts into the booth my friend has access to as a painter in a production shop. A nice heated downdraft booth is nice as the parts are fully cured in 45 min. Here, Scott’s applying sealer to a number of small parts that will be painted semi-gloss black (Sikkens Ralley Black). The exception is the hood which will get PPG/Ditzler’s modern version of the “Organisol Black” formula - DCC-9355. In another area I tackled the mirrors, lower grille, and underside of the trunk lid in orange with help from Scott.
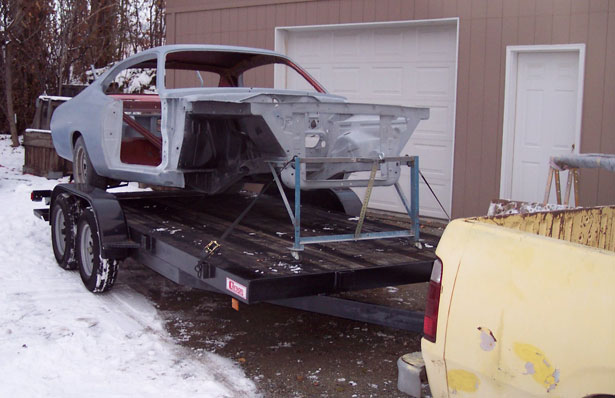
November 30, 2007 was D-day - the date scheduled to finally get the car back into the booth for paint. It had snowed a couple of times prior to this and I was really sweating it because weather could potentially prevent me from transporting the car on any given date. I hate snow and want to get this back together by Spring!
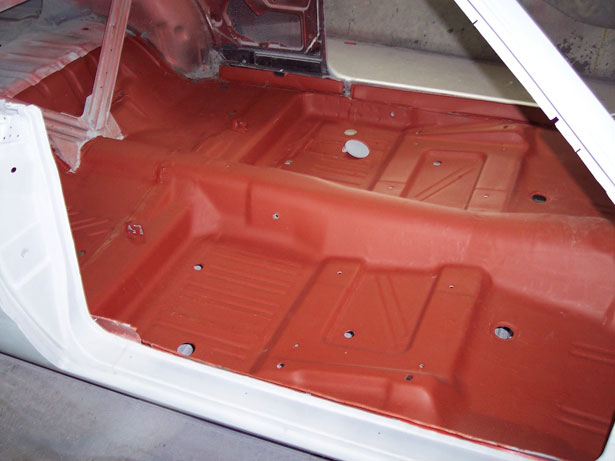
Several weeks prior to this I coated the floor with Eastwood Rust Encapsulator to seal everything up and make it look better. There’s was a lot of overspray from all the bodywork. Though there wasn’t any rust, this made a big difference visually.
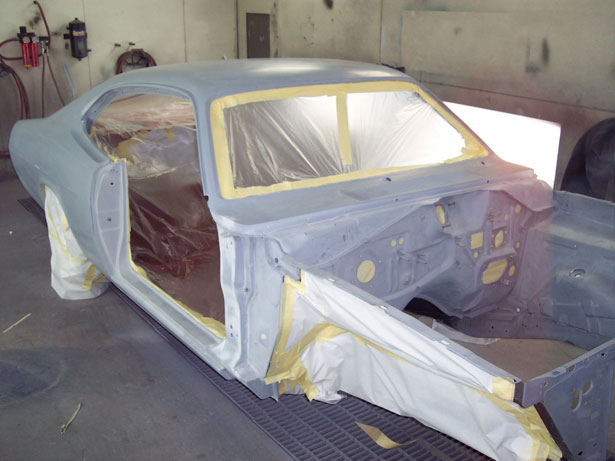
By the time I arrived the next morning (a Saturday) Scott had already gotten the body masked and ready to shoot sealer. I’m fortunate to have a friend who’s employer lets them pretty much do what they want on the weekends.
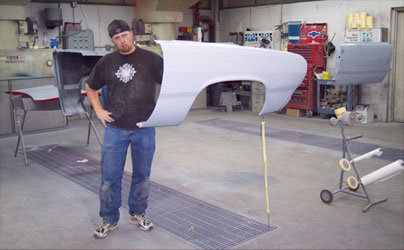
We hung the doors and fenders in another area (they consider this their prep area and do a lot of painting here) with downdraft capabilities. The trunk lid sat on a stand. We had already painted the underside back in October. As you can probably tell, Scott loves to have his picture taken.
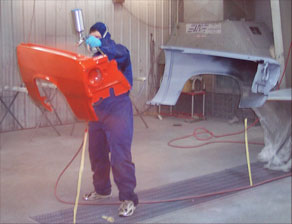
After applying a coat of sealer to everything, he mixed up the base and started spraying orange (Chrysler V2 - Street Hemi Orange). Everything got 3 coats of Lesonal (Akzo-Nobel) base. We used tack rags between coats to catch any dust or dirt that might have settled on the surface.
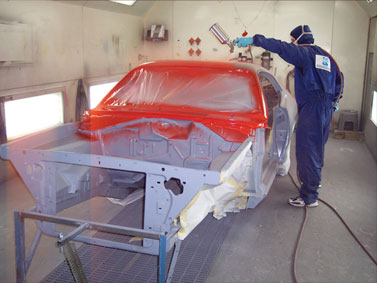
My other friend, Rob, who runs the paint store where I got all the materials was also kind enough to stop by and make sure everything went okay. Scott sprays PPG products on a daily basis so he was unfamiliar with the characteristics of this product.
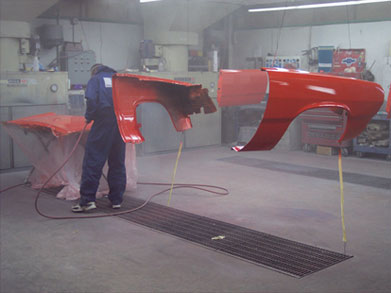
He had no problems with the Lesonal though. You’d think he’d sprayed it forever. I believe he used an Iwata LPH400 gun.
(Left) He’s nearly done applying 3 coats of Lesonal Universal Clear. I don’t know how his arms didn’t fall off after hours of spraying... (Young whippersnappers!)
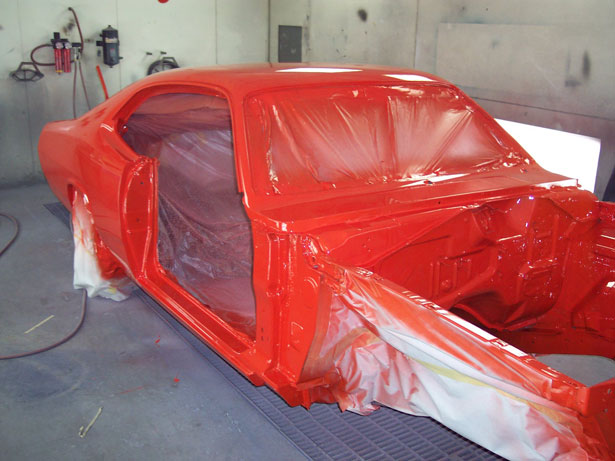
Here’s the body just prior to the third coat of clear. The third coat really gave it some depth and will allow plenty of material for a “cut-and-buff” later. Scott was reluctant to shoot a fourth coat because of the potential for solvent pop when it get’s that heavy. He has also seen panel gaps close to the point of rubbing. I don’t think old Mopars are known for tight gaps. When the last coat of clear was laid, then we kicked on the heat and baked everything for an hour.
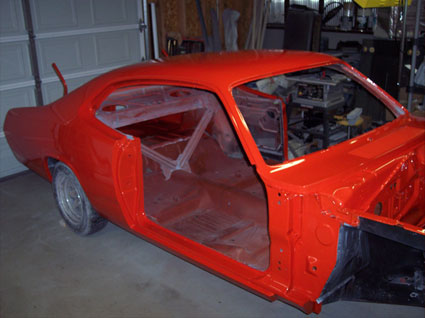
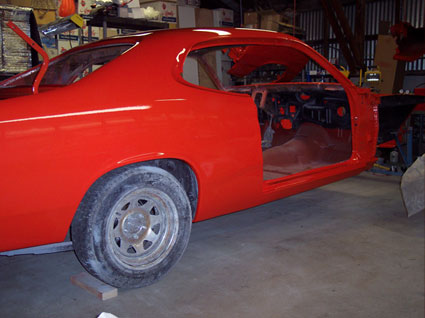
Everything was ready to go home at 4pm. By then it was starting to snow with a big storm front moving in. Luckily I'm only a couple of blocks from the place. We loaded the small pieces into vehicles and got them back to my shop after a couple of trips, then took the trailer down for the body. I was sweating the drive home because it’s uphill most of the way and it was getting slick fast. We barely made it, spinning the tires all the way to the shop. Once there, we got it inside and I took a couple of big cotton bath towels and chamoised the body off. Looked fine. Baking sure beats waiting overnight or longer. We got dumped on that night. I would have been screwed due to weather it I had waited any longer.
You might be wondering why I didn’t paint it myself after all the prep work prior. Well, that was my original plan but by this point in time I just wanted it done with as few problems as possible. Maybe I’ll paint my wife’s ‘69 Newport convertible instead...
From here you may wish to go to Reassembly
 |
 |
 |
 |
 |
 |
 |
 |
 |
© 2013 JP Herrick Enterprises - All Rights Reserved
Site updated: January 2014

