

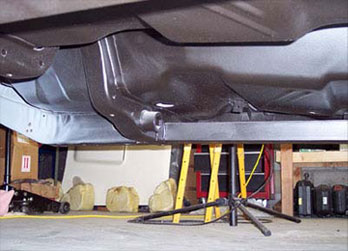
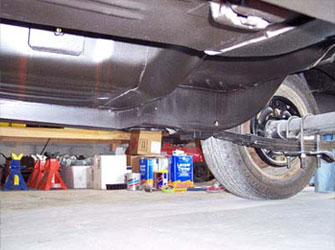
Shortly after the trunk floor was welded in, all remaining undercoating was removed. A dirty, nasty job no matter how you look at it. There are different ways to remove it but I used a propane torch to warm the undercoat and then scrapped it off with a putty knife. The solvent, Goof-Off, easily removed the residue.
Sub-frame connectors were fabbed from 2x3" box tubing and welded in place - strengthening the unibody substantially. Don't want the car twisting into a pretzel with that 440 engine.
Sub-frame connectors were fabbed from 2x3" box tubing and welded in place - strengthening the unibody substantially. Don't want the car twisting into a pretzel with that 440 engine.
Then, the entire undercarriage was sprayed in black Zero Rust. Not only does it look much better but will protect from further corrosion. New undercoating will be applied to key areas later for sound and increased protection.
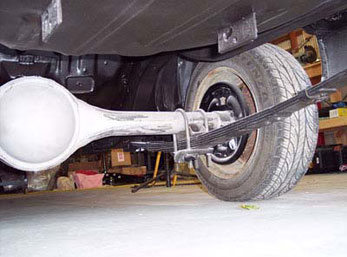
Offset spring hangers and shackles were installed. Some minor modification (cutting) of the frame rails is required for fastener clearance but it will move the new HD leaf springs inboard almost 1" on each side allowing the maximum tire width possible without mini-tubbing. At this stage of the game I just wasn't in the mood to cut up the wheel housings to gain clearance all the way to the frame rails (you can gain up to 3"). And, this is a street car, not drag - so I should still be able to get a respectable looking tire under there.
Here you can also see the lugs hanging down from the new floor where the gas tank straps will connect.
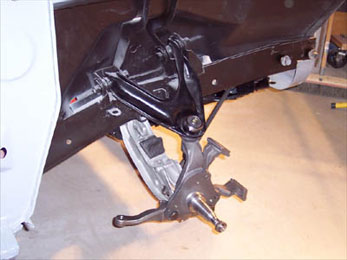
The front struts, lower control arms, steering knuckles, lower ball joints, and .920" torsion bars are installed. I then temporarily threw disc brake rotors on and and we've just about got a roller.
With stock-type 6 leaf rear springs I feel A-Body's sit too high in the rear for my taste. To get a better stance I lowered the rear 2" (later reduced to only a 1" drop) - but then the front was too high. Simply adjusting the torsion bars would result in inadequate suspension travel (bottoming out) so I turned to 2" drop spindles.
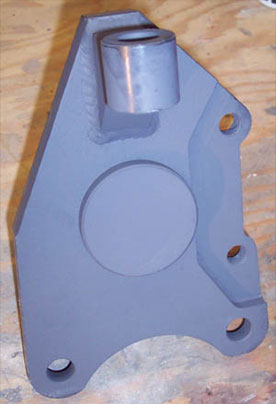
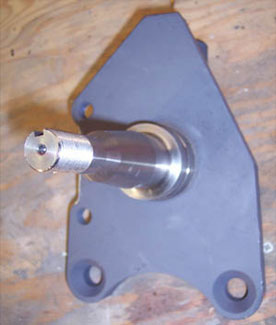
Fatman Fabrications is the only place in the country that makes drop spindles for ealier Mopars. They're actually designed for F-Body (Volare/Aspen or all B, F, J, M-Body vehicles) cars but will work on A-Body's. All stock brake and steering components will bolt right on. The difference between the two is, the F-Body knuckle is about 3/8" taller. There's been a lot of debate over using the taller knuckle but the concerns are largely unfounded. In fact, the geometry is slightly improved under certain conditions (see this article on BigBlockDart.com). UPDATE: Magnumforce Race Car Fabrication now sells nice drop spindles!
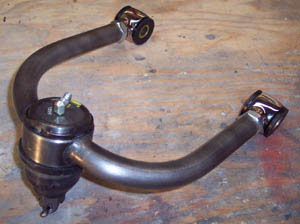
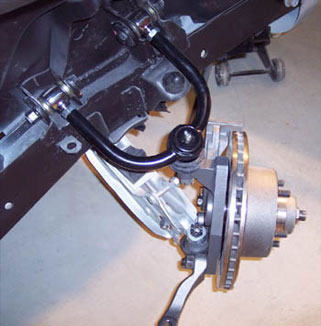
I ordered adjustable upper control arms from Reilly Motorsports. Though not strictly required, the change to Fatman spindles could potentially restrict the amount of caster that can be dialed into the front-end - perhaps even preventing the stock setting of 3/4 degree from being attained. A little extra caster (3+ degrees) over stock specs can go a long way to improve handling and stability in these cars.
The polished stainless bushing ends should be good for a couple of horse power :)
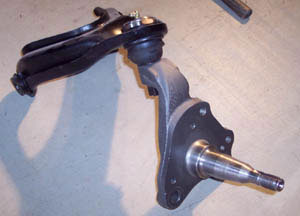
The factory '73-'76 spindles and upper control arms which I had previously refurbished from the junk yard and installed with new bushings and ball joint were pulled.
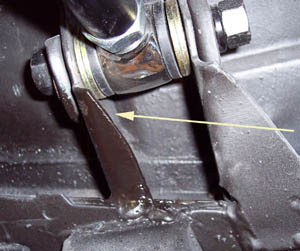
The Reilly piece slipped right in with the supplied spacer washers on either side of the bushing. I ground the upper corner of the tower to provide clearance for the lock nut on the bushing end that could potentially interfere only under certain conditions.
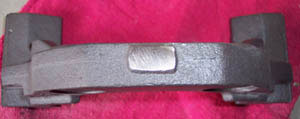
There's a casting boss on the edge of the brake caliper bracket that may have to be ground down for clearance in order to bolt it to the Fatman knuckle. The boss serves no purpose in stock application so it's no biggy to grind it down. In fact, the boss on the bracket on the other side was completely gone so no grinding was necessary on that one.
I also found later that I had to add a washer/spacer (approx. 0.110" thick) between the caliper bracket and knuckle so that the bracket wouldn't interfere with the rotor. Hardened hardware store (Dorman) washers did the trick.
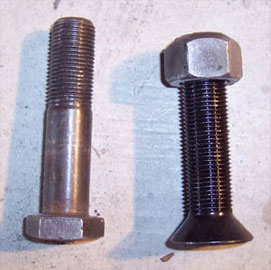
Fatman also provides rececessed bolts to replace the stock lower ball joint to knuckle bolts - again, for clearance between the knuckle and rotor.
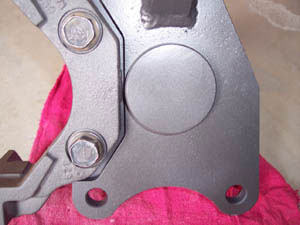
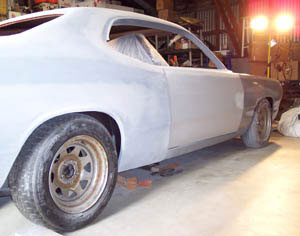
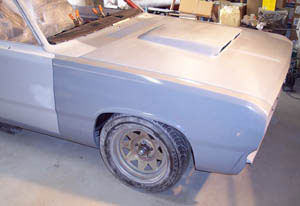
And, here's the completed assembly with the resulting stance....
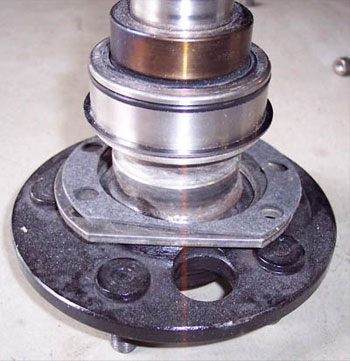
Rear axle bearings are a hotly debated topic among Mopar gear-heads. Some feel "Green" bearings are the greatest thing since sliced bread and others won't touch them, preferring their tapered rollers and adjusters. For ease and simplicity I decided to try the Greens. They're sealed - requiring no lubrication, preload adjustment, or axle buttons. There are two designs. This one uses a snap ring and separate retainer, which I believe is superior to the integrated retainer.
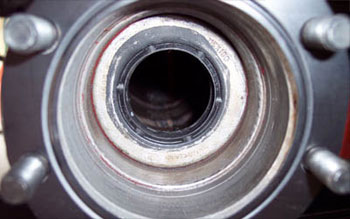
Since a rubber o-ring is built into the bearing to seal out gear lube, the traditional inner axle seal can be eliminated. I decided to install the inner seals anyway just as an added measure of insurance. You'd think think these seals were gold-plated for what they cost these days. Ridiculous! Even with a seal driver they' were a hassle to install without boogering up.
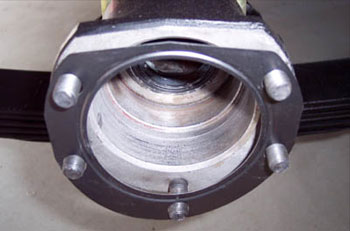
An embossed metal gasket goes on the end of the housing next...
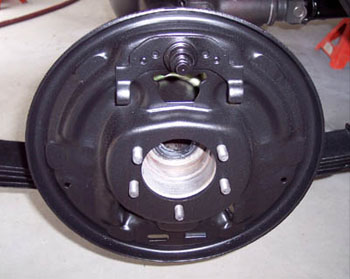
Followed by the brake backing plate. Because of the emergency brake cable there is a "right" and "left"...
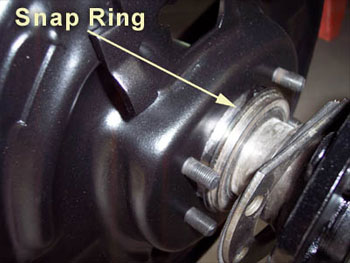
The snap ring on the bearing keeps the axle from being pushed in too far. The retainer keeps it from sliding out. A little grease or petroleum jelly on the o-ring helps the axle slide in...
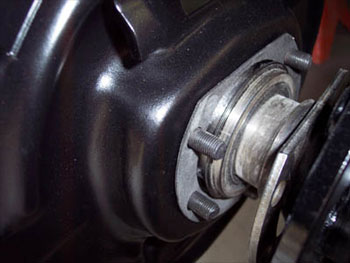
The soft gasket/seal goes on over the studs next. (Remember to put it on before sliding the axle in). If you're not the "gasket/seal" type then RTV will work - though technically neither is probably necessary with "Greens"...
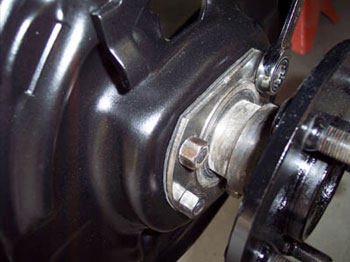
And finally, nuts hold the retainer in place.
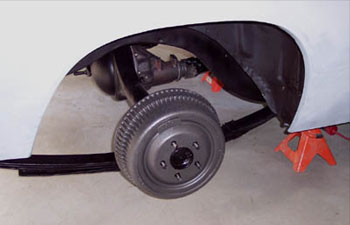
Voilá... Ready to measure for wheels/tires!
Front and rear ADDCO sway bars are waiting for installation.
Most of the replacement suspension parts, including the rear springs came from ESPO.
The differential bearings, suregrip rebuild parts, Greens, and other misc. came from Dr. Diff.
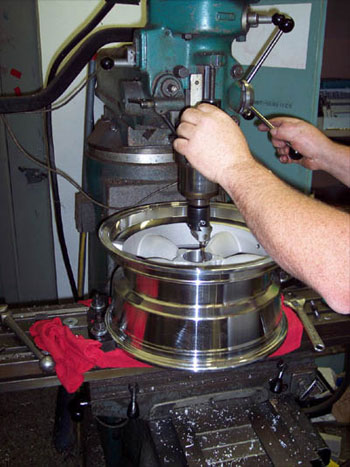
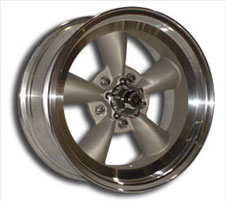
Vintage Wheel Works in CA makes a wheel that looks like American Racing's Torq-thrust D. They actually have a greater selection of diameters and widths with custom offsets available. Since the AR's were on national backorder at the time I ordered a set of 16x8's from Vintage. The cost was similar. However, what I discovered after receiving them was that the centerbore is 2.75" - which is a Ford standard. They won't quite fit over the stock Mopar disk brake hub!
Nevertheless, I'm glad I went with this company as it's a very nice wheel that is comparably priced to the AR's. (And Eli is a nice guy to deal with). Fortunately, I have a friend who has a Bridgeport milling machine in his home shop. He opened the centers up to about 2.85".
Nevertheless, I'm glad I went with this company as it's a very nice wheel that is comparably priced to the AR's. (And Eli is a nice guy to deal with). Fortunately, I have a friend who has a Bridgeport milling machine in his home shop. He opened the centers up to about 2.85".
UPDATE: Current production of these wheels have the correct centerbore diameter so they will fit over stock disc brake hubs without mods! Also I have replaced the fronts with 16x7's and a slightly narrower tire for improved fender clearance. Tires are 255/50-16 in the rear and 205/55-16 in front.
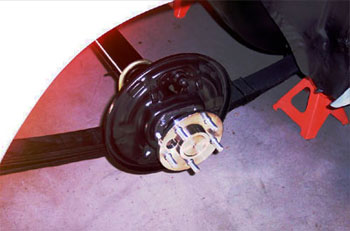
Okay, same song, second verse. Dr. Diff narrowed the housing to my specs (58 1/4") based on where I wanted the wheels to sit in the well. It's now narrower than a stock B but wider than a stock A. The axles are new also (aren't they pretty?) You can't cut and respline a stock B axle - the material isn't there. The Dr. also cuts the new axles for maximum engagement in the two piece side gears of the diff. In any case they also use the Green bearing, so everything else looks and works like what I had before.
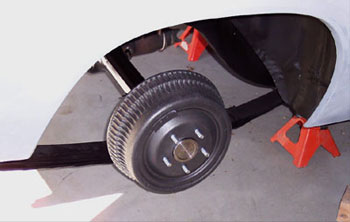
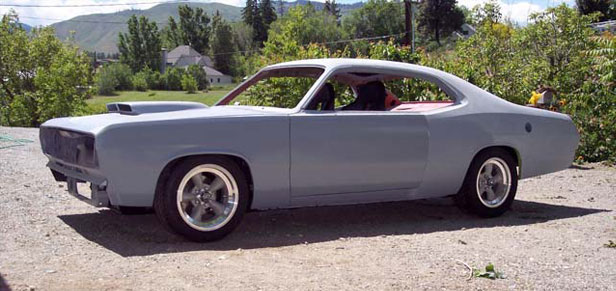
By the way, I would have liked to have gone with a 275 tire - there's room for it, and in which case I would have gone narrower in the rear but: Oddly, I couldn't find a 275 for a 16" wheel. You can for 15" and 17" wheels. Widest is a 255. Well, that's not entirely true as I could have gone with a M/T or Hoosier racing tire in an equivilant size but...
Wide was for aesthetic purposes, mainly. A 255 looks good.
From here you may wish to go to Reassembly
I've since learned that a 1" or larger torsion bars are enough to overcome inadequate suspension travel - so you can do a 2" drop without drop spindles.
Save yourself $500!
Save yourself $500!
 |
 |
 |
 |
 |
 |
 |
 |
 |
© 2013 JP Herrick Enterprises - All Rights Reserved
Site updated: January 2014

